
Path Editing
Path Editing
Section titled “Path Editing”The path editor allows you to create complex autonomous routines using Bezier curves. Each segment of your path is managed through its own panel in the sidebar.
Path Panels
Section titled “Path Panels”Each path segment has a dedicated panel with several controls:
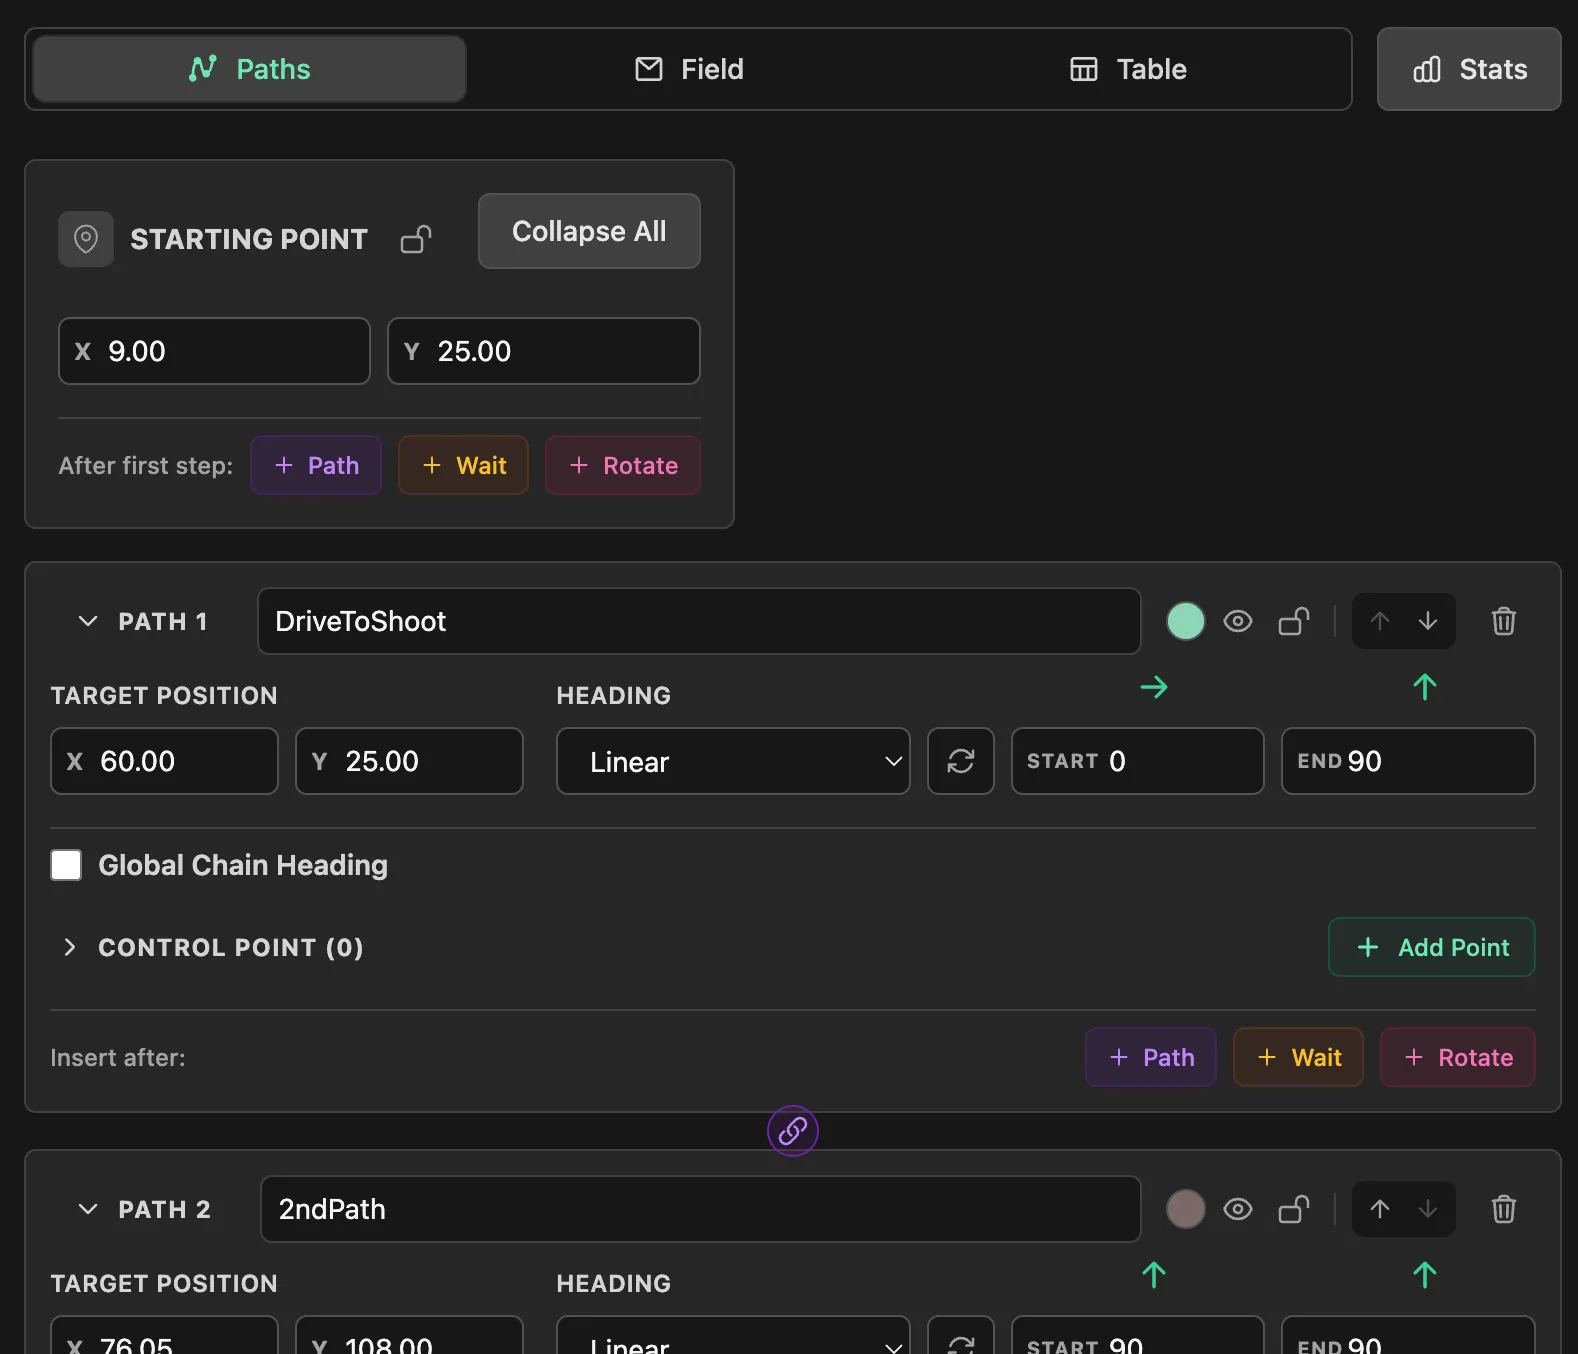
- Expand/Collapse: Click the arrow or path name to show or hide details.
- Renaming: Click the name to rename. Tip: Paths with the same name are "linked" — moving one automatically moves the others.
- Locking: Click the Lock Icon to prevent accidental edits to a path.
- Color: Click the color circle to verify or change the path's color.
- Reorder: Use the Up/Down Arrows to change the sequence of the path.
Point Configuration
Section titled “Point Configuration”Inside an expanded panel, you can precisely configure the endpoint:
- Position: Manually enter X and Y coordinates (in inches). Inputs respect your grid snapping settings.
- Heading Modes: Control the robot's orientation:
- Constant: Robot maintains a fixed heading (Degrees).
- Linear: Heading changes smoothly from a Start angle to an End angle.
- Tangential: Robot faces the direction of travel. Check Reverse to drive backwards.
Control Points
Section titled “Control Points”The Control Points section allows you to shape the Bezier curve:
- Add/Remove: Click Add Point in the Control Point row to create complex curves. Use the trash icon to remove them.
- Precise Editing: Enter exact X/Y coordinates for every control point.
- Reorder: Drag and drop control points in the list to change their order of influence.
Panel Actions
Section titled “Panel Actions”At the top right of each path panel, next to the color circle:
- Eye: Hide the path on the field, or show it again.
- Lock: Prevent accidental edits to the path.
- Up/Down Arrows: Move the path earlier or later in the sequence.
- Trash: Remove the path.
At the bottom of the panel, the Insert after: row adds a step right after this path:
- + Path: Insert a new path.
- + Wait: Insert a stop/wait command.
- + Rotate: Insert a turn in place.
Table View
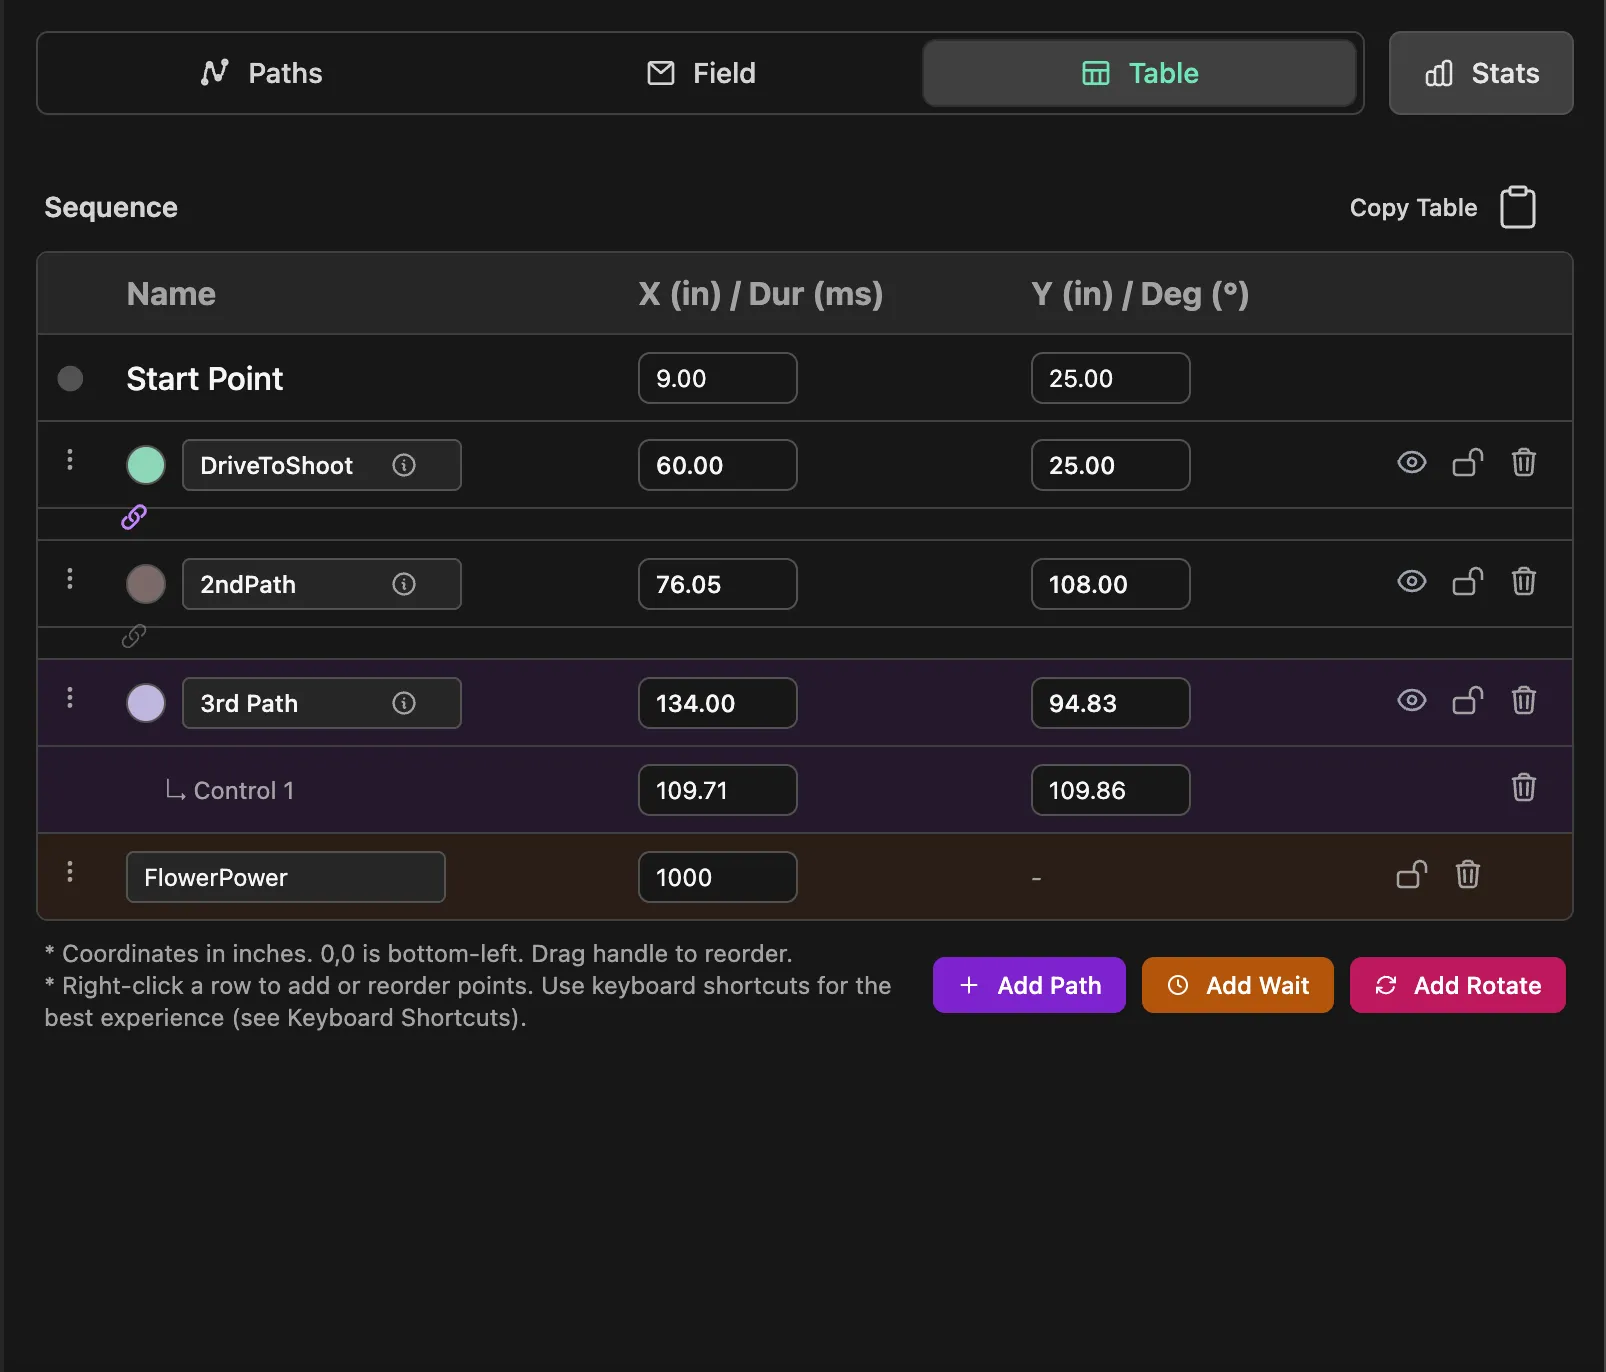
Section titled “Table View”The Table tab lists the whole sequence in one place: the start point, every path with its control points, and any waits and rotations. Edit coordinates and durations inline, drag the handle to reorder rows, or right-click a row for more actions. Add Path, Add Wait, and Add Rotate at the bottom add a step to the end. Copy Table puts the sequence on your clipboard as Markdown.
Keyboard Shortcuts
Section titled “Keyboard Shortcuts”- Add Point:
Double Clickon field map - Delete:
BackspaceorDeletekey - Duplicate:
Shift + D - Undo/Redo:
Ctrl + Z/Ctrl + Y