
Path Optimization
Path Optimization
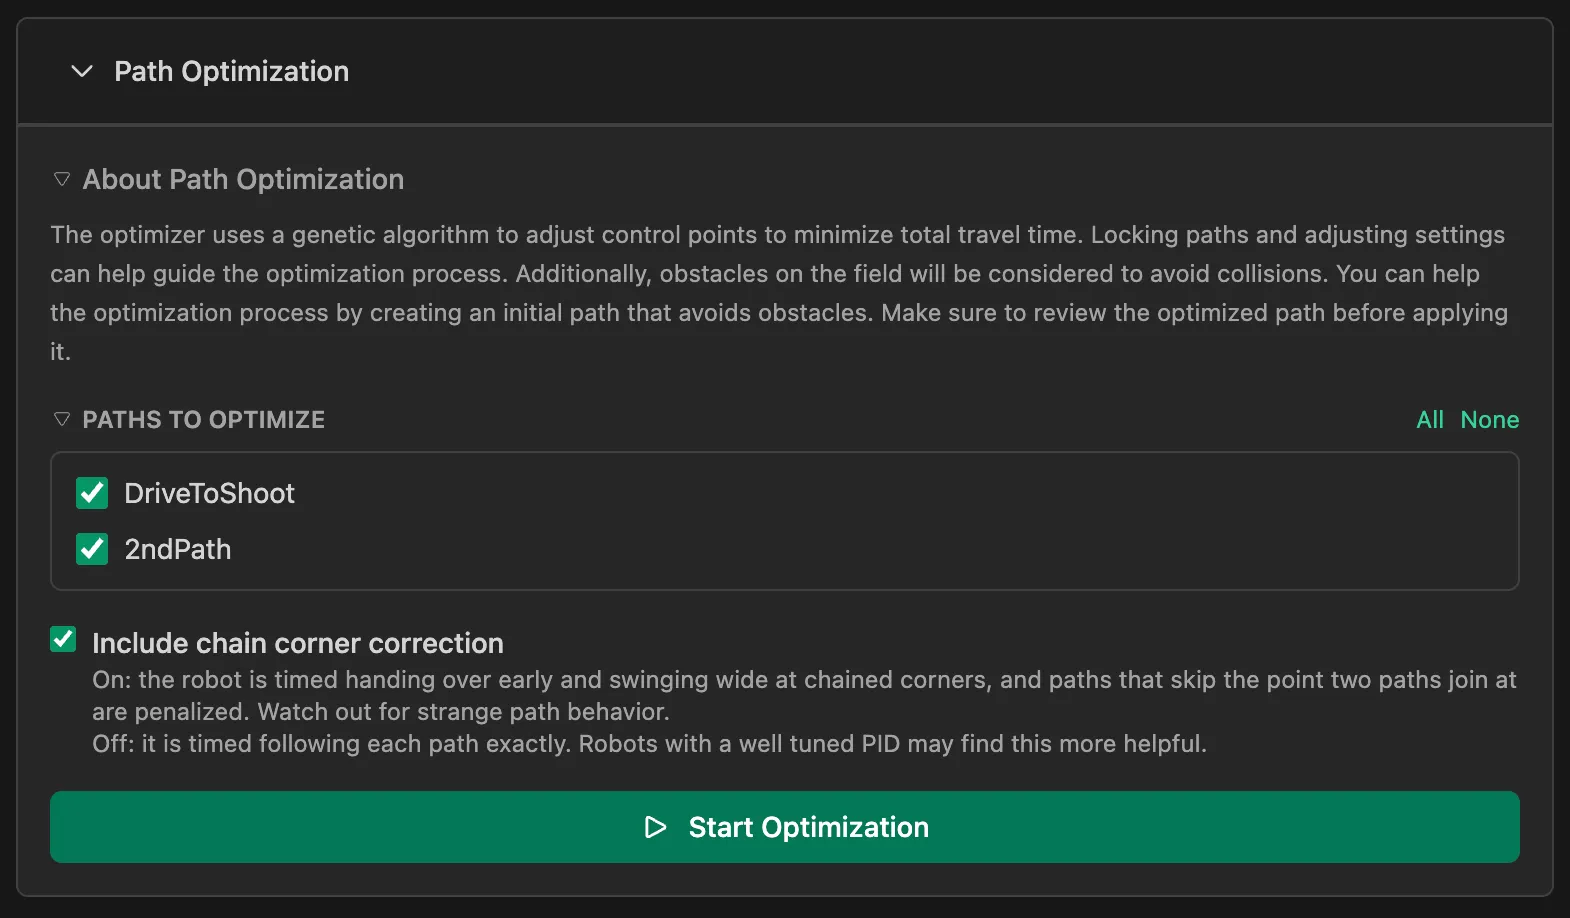
Section titled “Path Optimization”The Path Optimizer uses a genetic algorithm to automatically refine your autonomous paths. It evolves your path over multiple generations to find the fastest route while strictly avoiding collisions.
You'll find it in the Field tab, in the Path Optimization panel.
Core Concepts
Section titled “Core Concepts”The optimizer treats your path like a living organism that evolves. It tries thousands of variations to balance two competing goals:
- Speed: Minimizing travel time based on your robot's constraints (velocity, acceleration).
- Safety: Avoiding all defined obstacles and field boundaries.
Before You Start
Section titled “Before You Start”For the optimizer to work effectively, ensure your Settings are accurate:
- Robot Dimensions: Set the correct
LengthandWidthof your robot. - Safety Margin: Add a buffer (e.g., 2 inches) to ensure you don't graze obstacles. The more precise the drive train the smaller the buffer.
- Motion Settings: Set your robot's real velocities, acceleration, and Translational P. The optimizer uses them to time chained corners.
- Obstacles: Define accurate obstacles in the "Obstacles" tab.
The Optimization Process
Section titled “The Optimization Process”When you run the optimizer, it follows these steps:
- Initialization: It starts with your current path and creates 50+ variations (the "population").
- Evaluation: It simulates every path to calculate travel time and check for collisions.
- Selection: It keeps the fastest, safest paths. Colliding paths are heavily penalized.
- Mutation: It slightly modifies the survivors—moving control points or adding/removing them—to explore new solutions.
- Repeat: This cycle repeats for the defined number of iterations.
Note: The optimizer will automatically add or remove control points if it helps navigate around an obstacle.
Chained Paths and Sharp Corners
Section titled “Chained Paths and Sharp Corners”The optimizer can handle chained paths where the robot has to swing wide at a sharp corner. When your project has chained paths, the Path Optimization panel shows an Include chain corner correction checkbox before you start a run. It is on by default, applies to that run only, and isn't saved as a setting.
- On: The robot is timed handing over early and swinging wide at chained corners. A swing into an obstacle counts as a collision, and paths that skip the point where two paths join are penalized. Watch out for strange path behavior.
- Off: The robot is timed following each path exactly. Robots with a well-tuned PID may find this more helpful. Once you apply a path optimized this way, the simulation includes the corner correction, so its time and route can differ from what the optimizer reported.
After a run, the panel tells you how many sharp chained corners are left in the optimized path. These are warnings, so you can still apply the path. Check Path Statistics and verify the path yourself.
Understanding the Settings
Section titled “Understanding the Settings”You can tune the optimizer in the Settings menu. Here is what each knob does:
1. Optimization Iterations
Section titled “1. Optimization Iterations”- What it is: The number of generations the algorithm runs.
- Effect: Higher values give the optimizer more "time to think."
- Recommendation: Start with 100. Increase to 300+ for complex obstacle courses.
2. Population Size
Section titled “2. Population Size”- What it is: The number of path variations tested in each generation.
- Effect: Larger populations explore more options but run slower.
- Recommendation: 50 is usually sufficient.
3. Mutation Rate
Section titled “3. Mutation Rate”- What it is: The probability that a control point will be moved in a generation.
- Effect:
- Low (0.1): Fine-tuning. Good for polishing a nearly perfect path.
- High (0.5): Exploration. Good for finding completely new routes.
- Recommendation: Default is 0.4.
4. Mutation Strength
Section titled “4. Mutation Strength”- What it is: The maximum distance (in inches) a point can move during a single mutation.
- Effect:
- Low (1.0): Small nudges.
- High (10.0): Large jumps.
- Recommendation: Default is 6.0. The optimizer automatically increases this if the path is currently colliding.
Pro Tips
Section titled “Pro Tips”- Locking: If you have a segment you know is perfect (e.g., scoring alignment), select the line and check Lock Line. The optimizer will not touch it.
- Good Start: Give the optimizer a rough path that is somewhat close to valid. It works faster if it doesn't have to untangle a complete mess.
- Visual Feedback: The dashed line shows the best path found so far. If it stops improving, you can click Stop Optimization early.